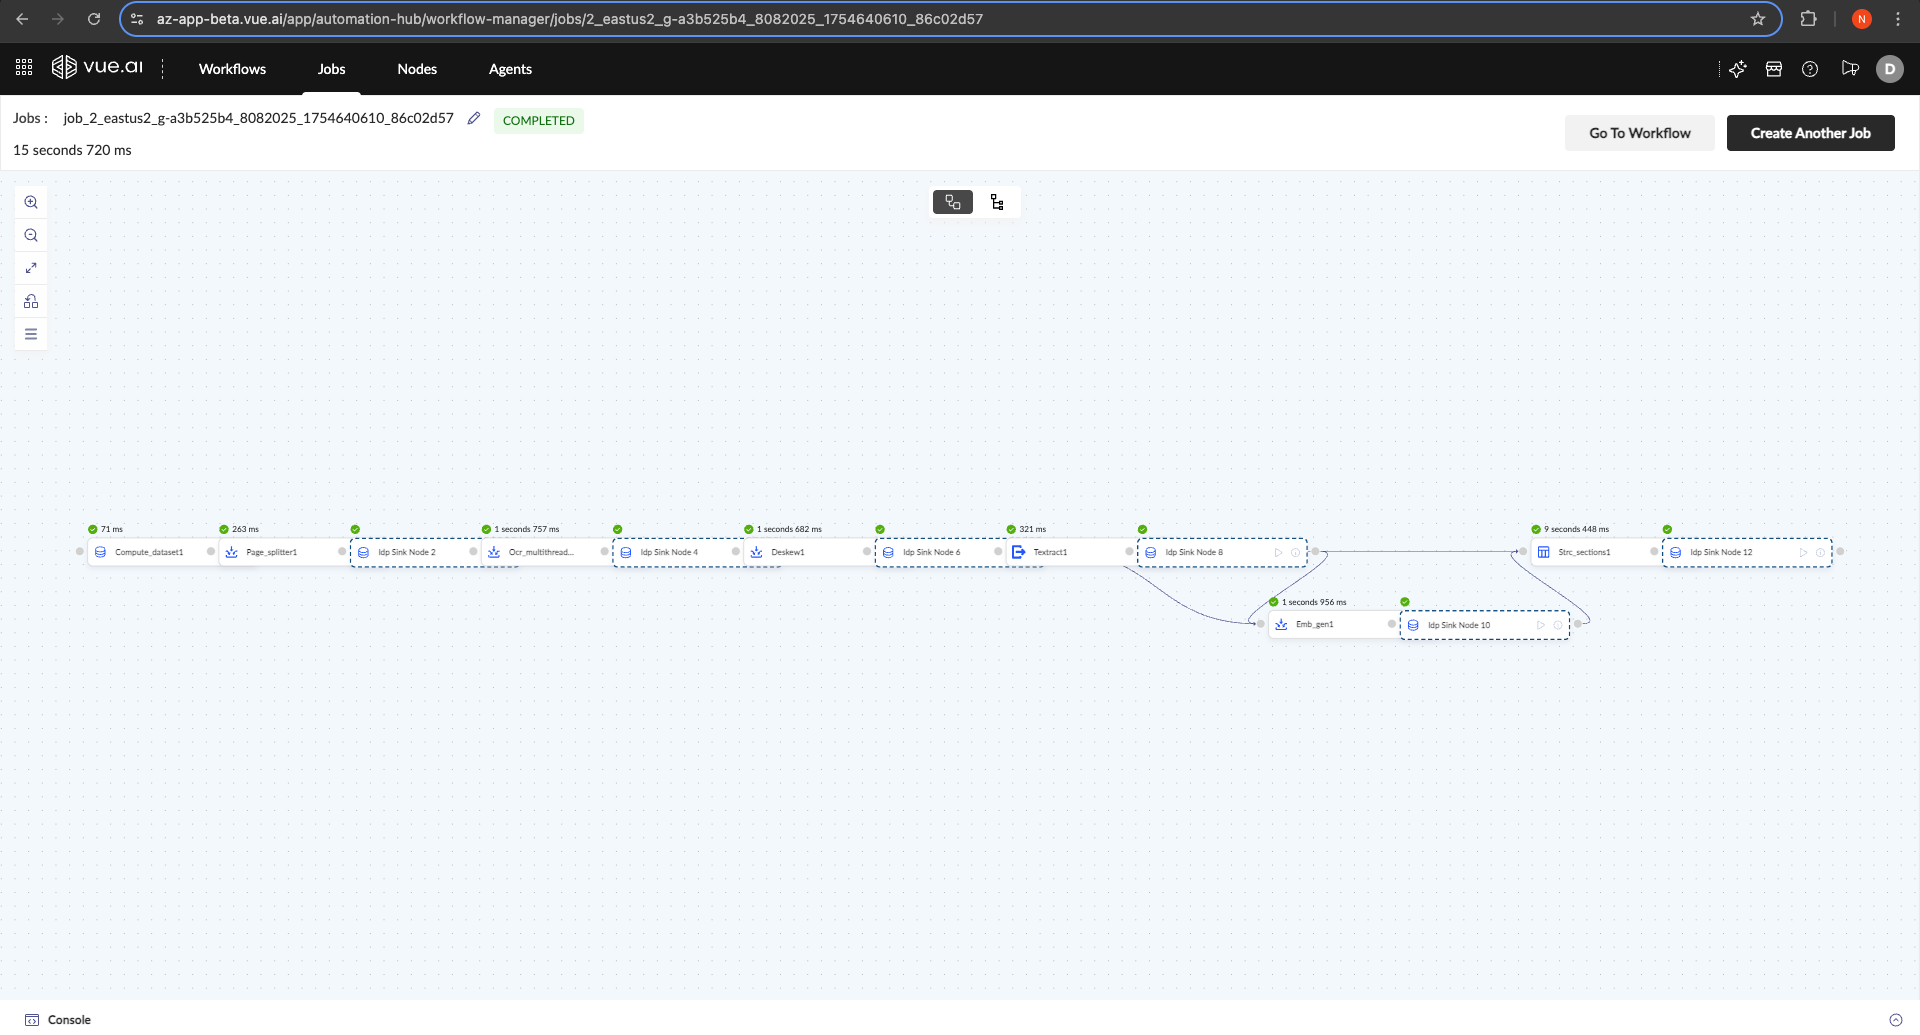
Step 1: Navigate the Documents Hub
Access from Data Hub → Document Manager → Documents. Use search and filters, assign documents for review, or jump to actions like Annotate and View Job.

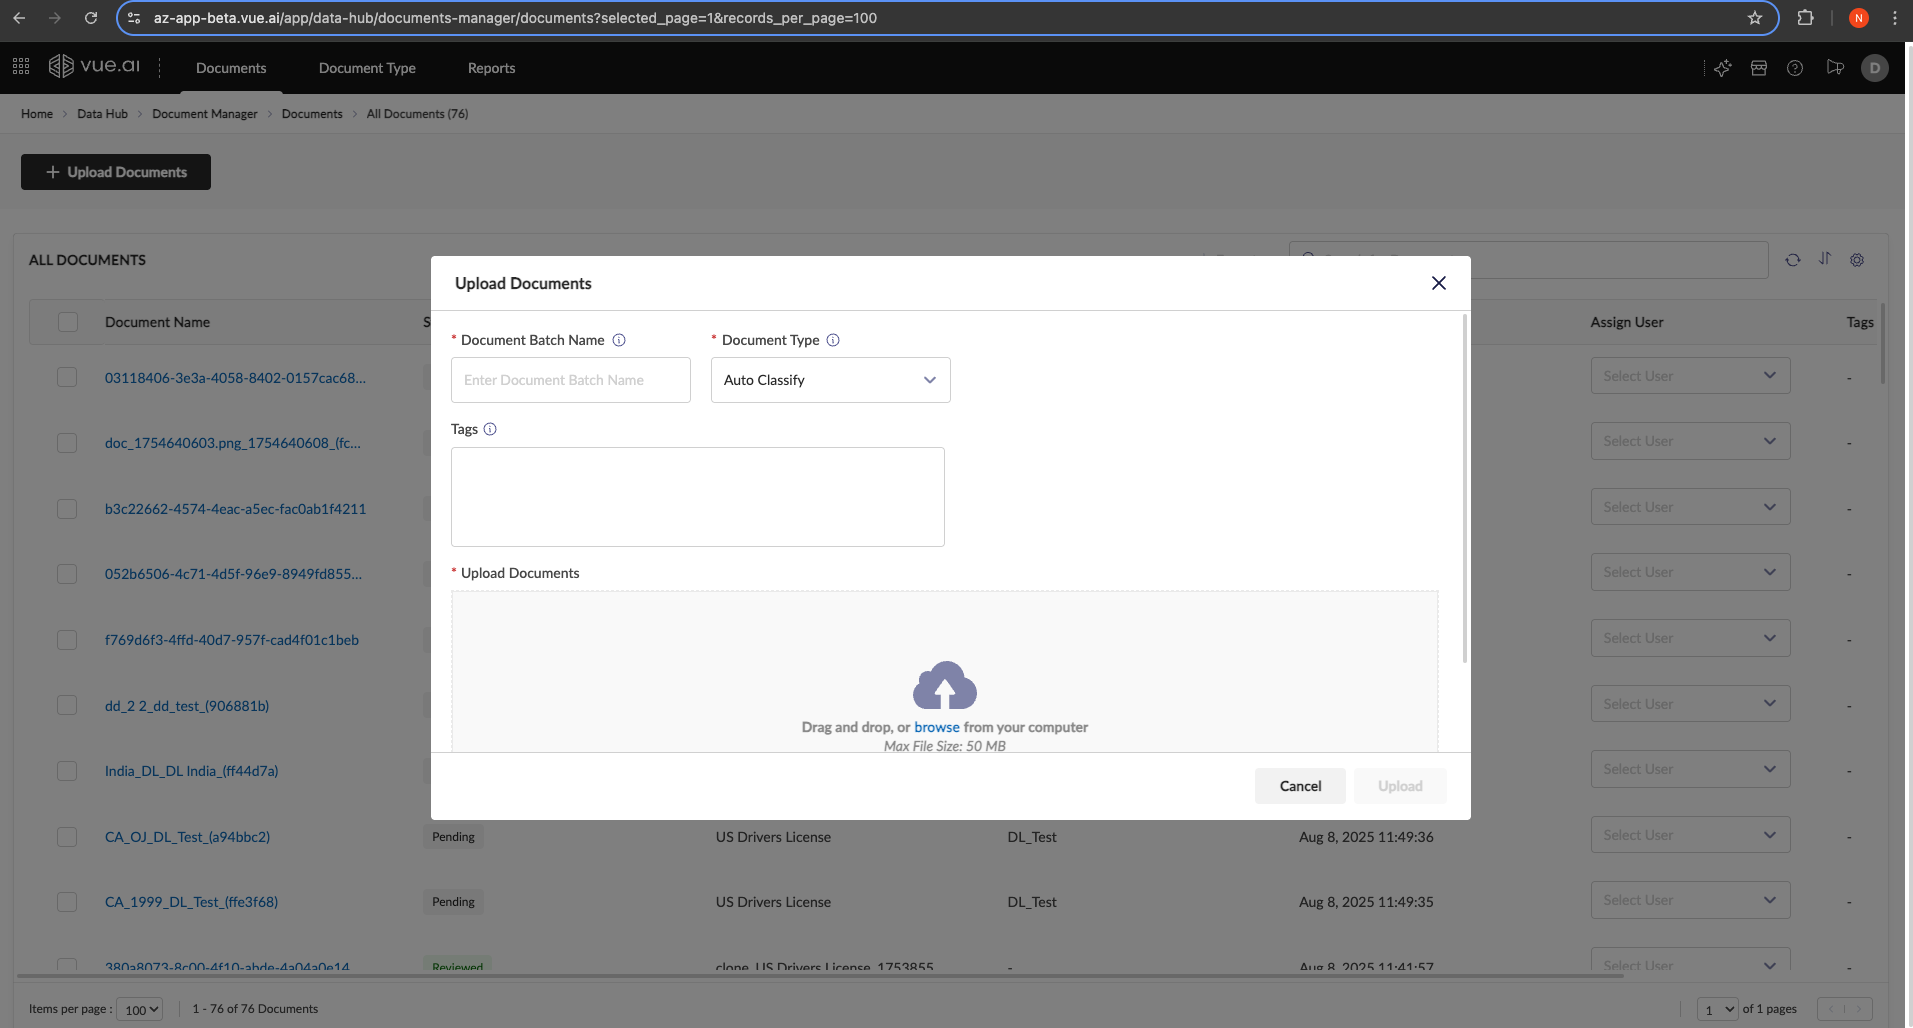
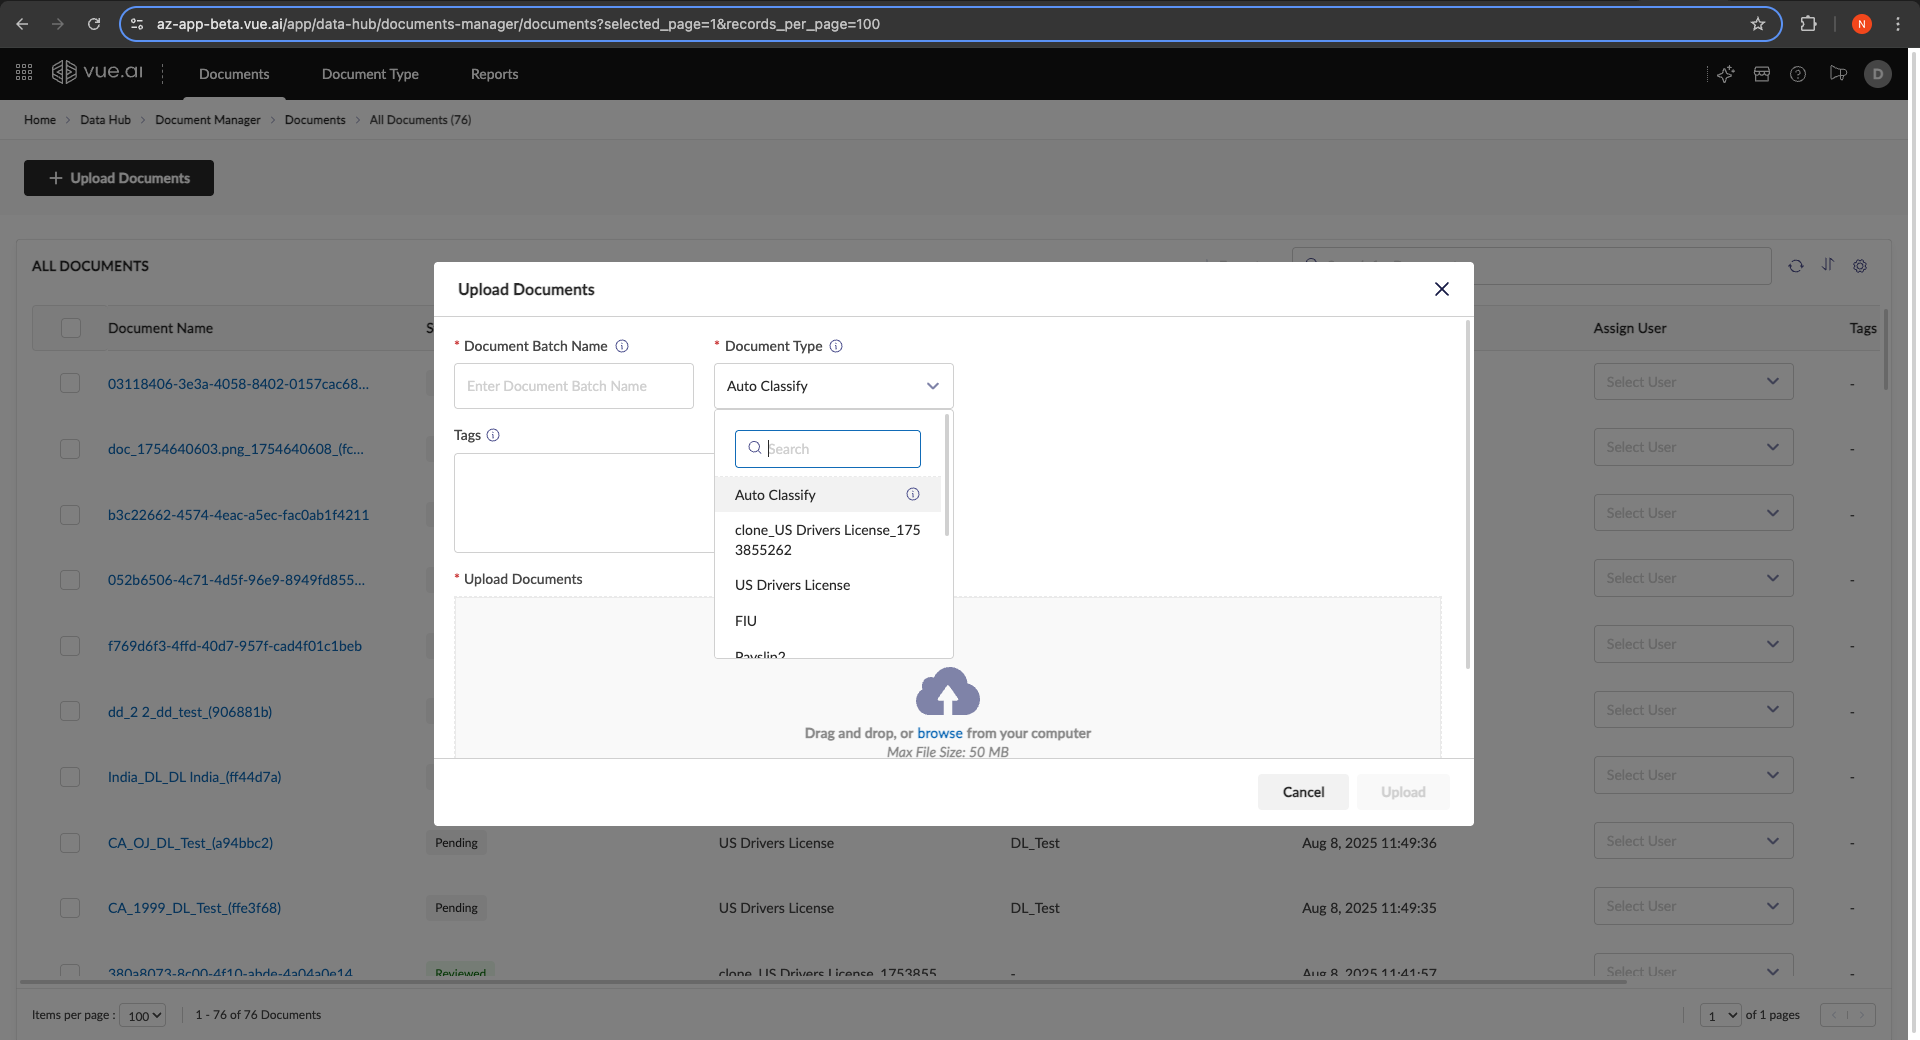
Step 2: Upload New Documents
- Click + Upload Documents.
- Provide a Document Batch Name and optional Tags.
- Choose a Document Type:
- Select a specific type if all documents are the same.
- Or choose Auto Classify to auto-identify types per document.
- Drag-and-drop files or browse to upload.
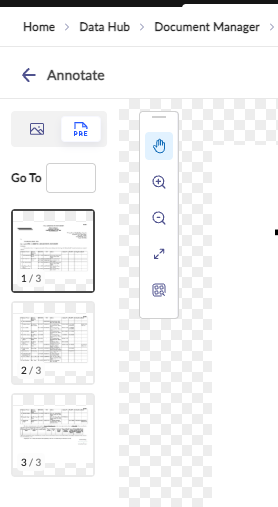
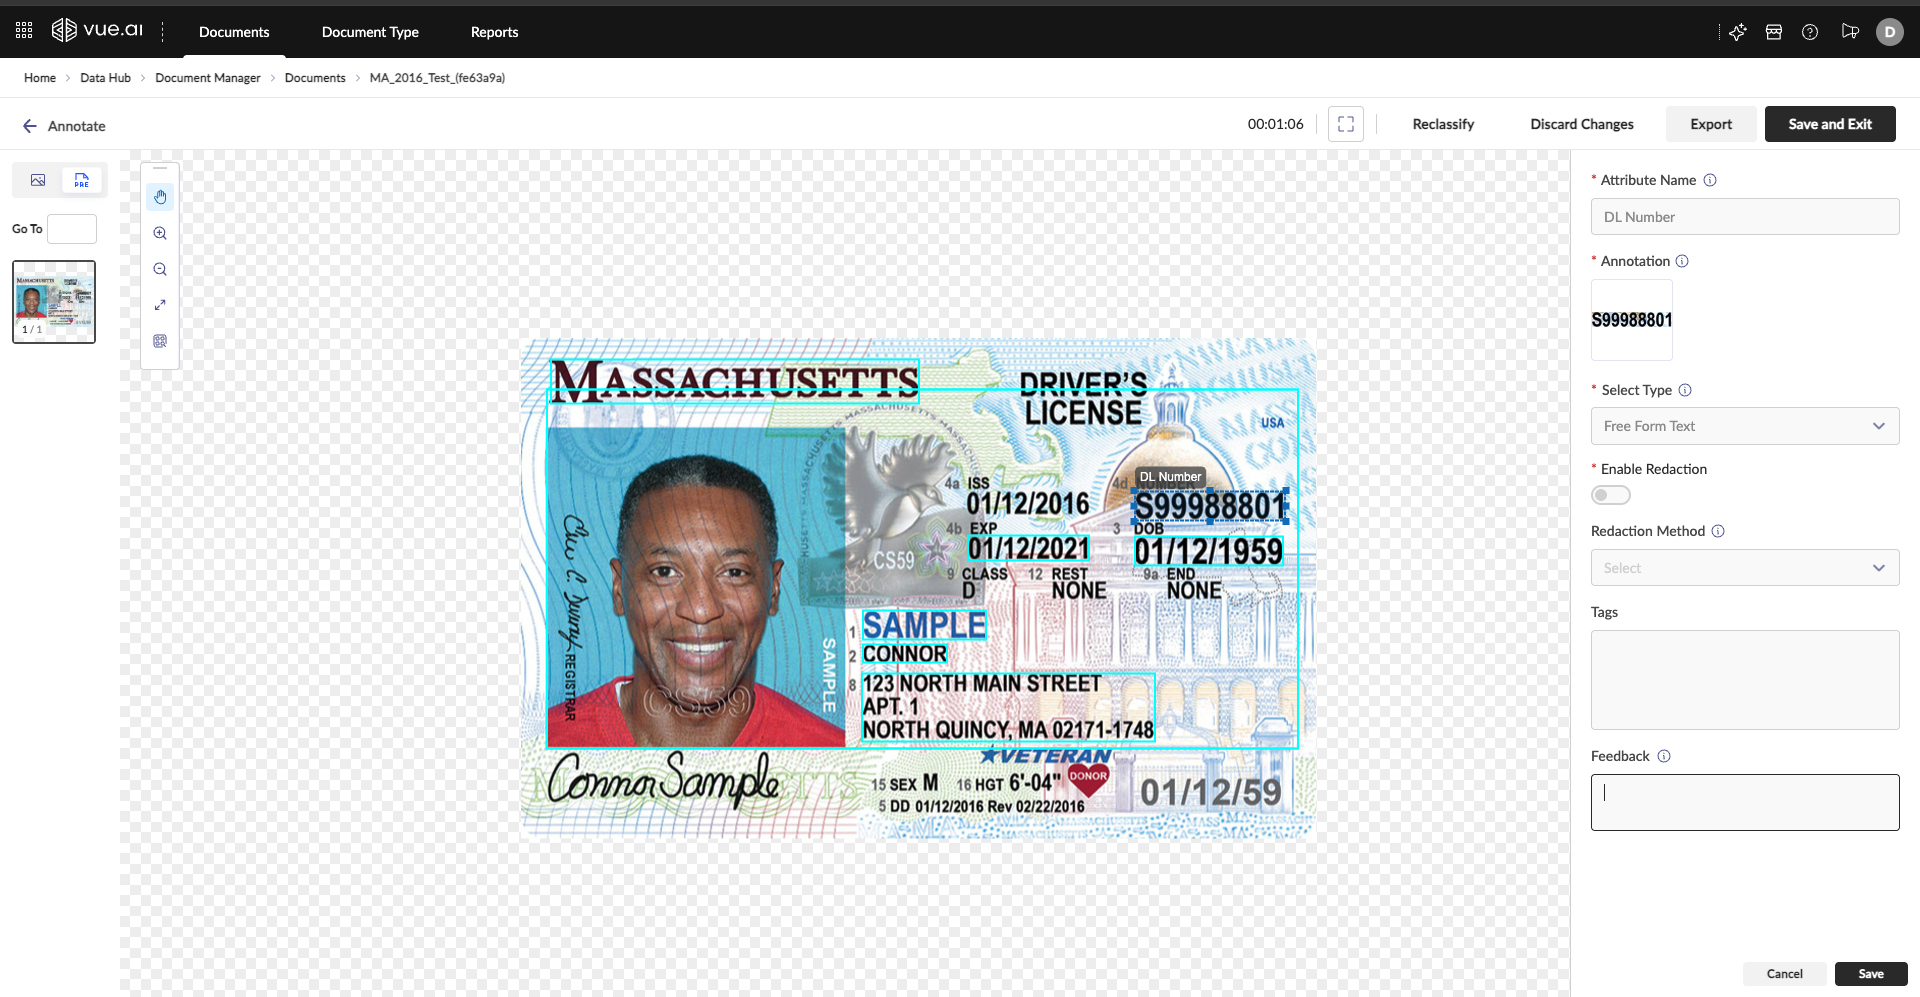
Step 3: Review and Annotate Extraction Results
Open Annotate for a document to review results in a three-panel layout.

- Left Panel: Page thumbnails for navigation.
- Center Panel: Document viewer with bounding boxes.
- Right Panel: Extracted data for edit and verification.
Correcting Data
If a value is incorrect:
- Click the attribute in the right panel.
- Edit the text, re-draw the bounding box, or provide natural language feedback.
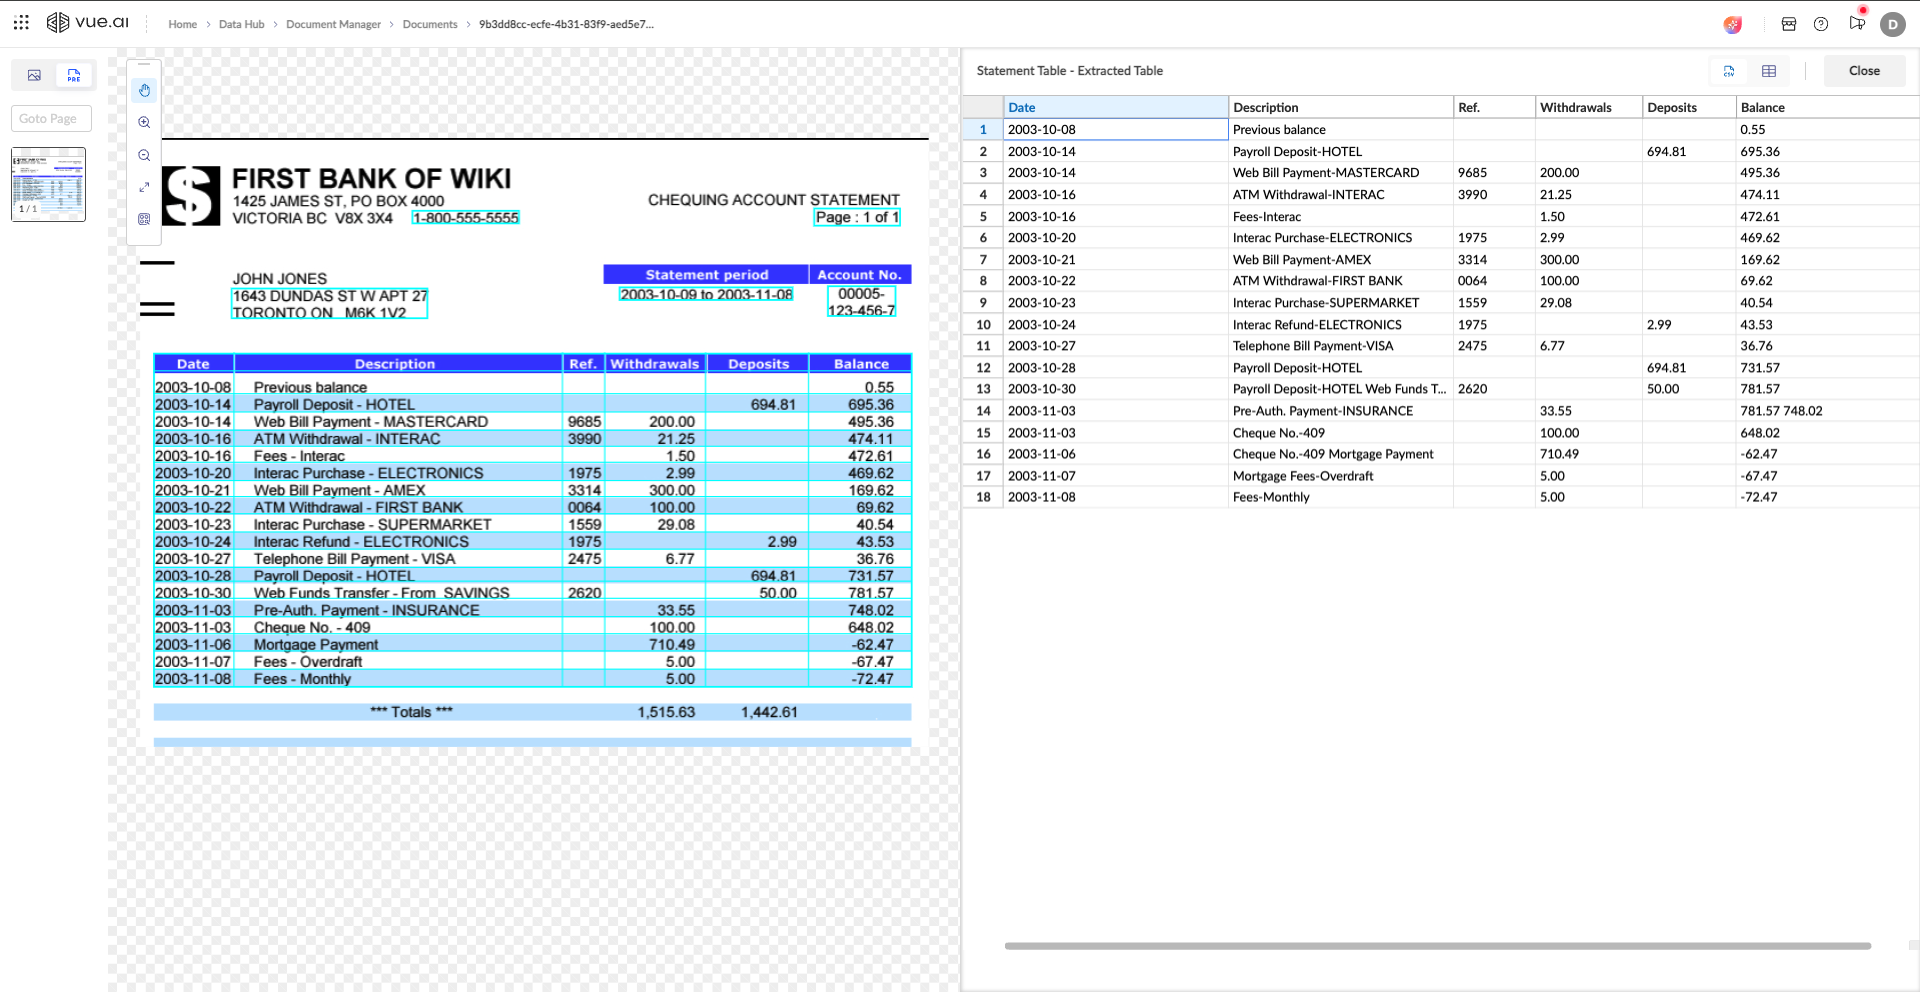
Step 4: Review Extracted Tables
Tables include a specialized review experience:
- Merged View: For multi‑page tables, see a single merged table first; expand to per‑page tables.

- Review Views: Switch between:
- Spreadsheet View: Sort, filter, and compute quick sums.
- Cell View (Show Crops): See image snippets per cell to verify characters.
| Spreadsheet View (with Column Management) | Cell View (Visual Crops) |
|---|---|
 | 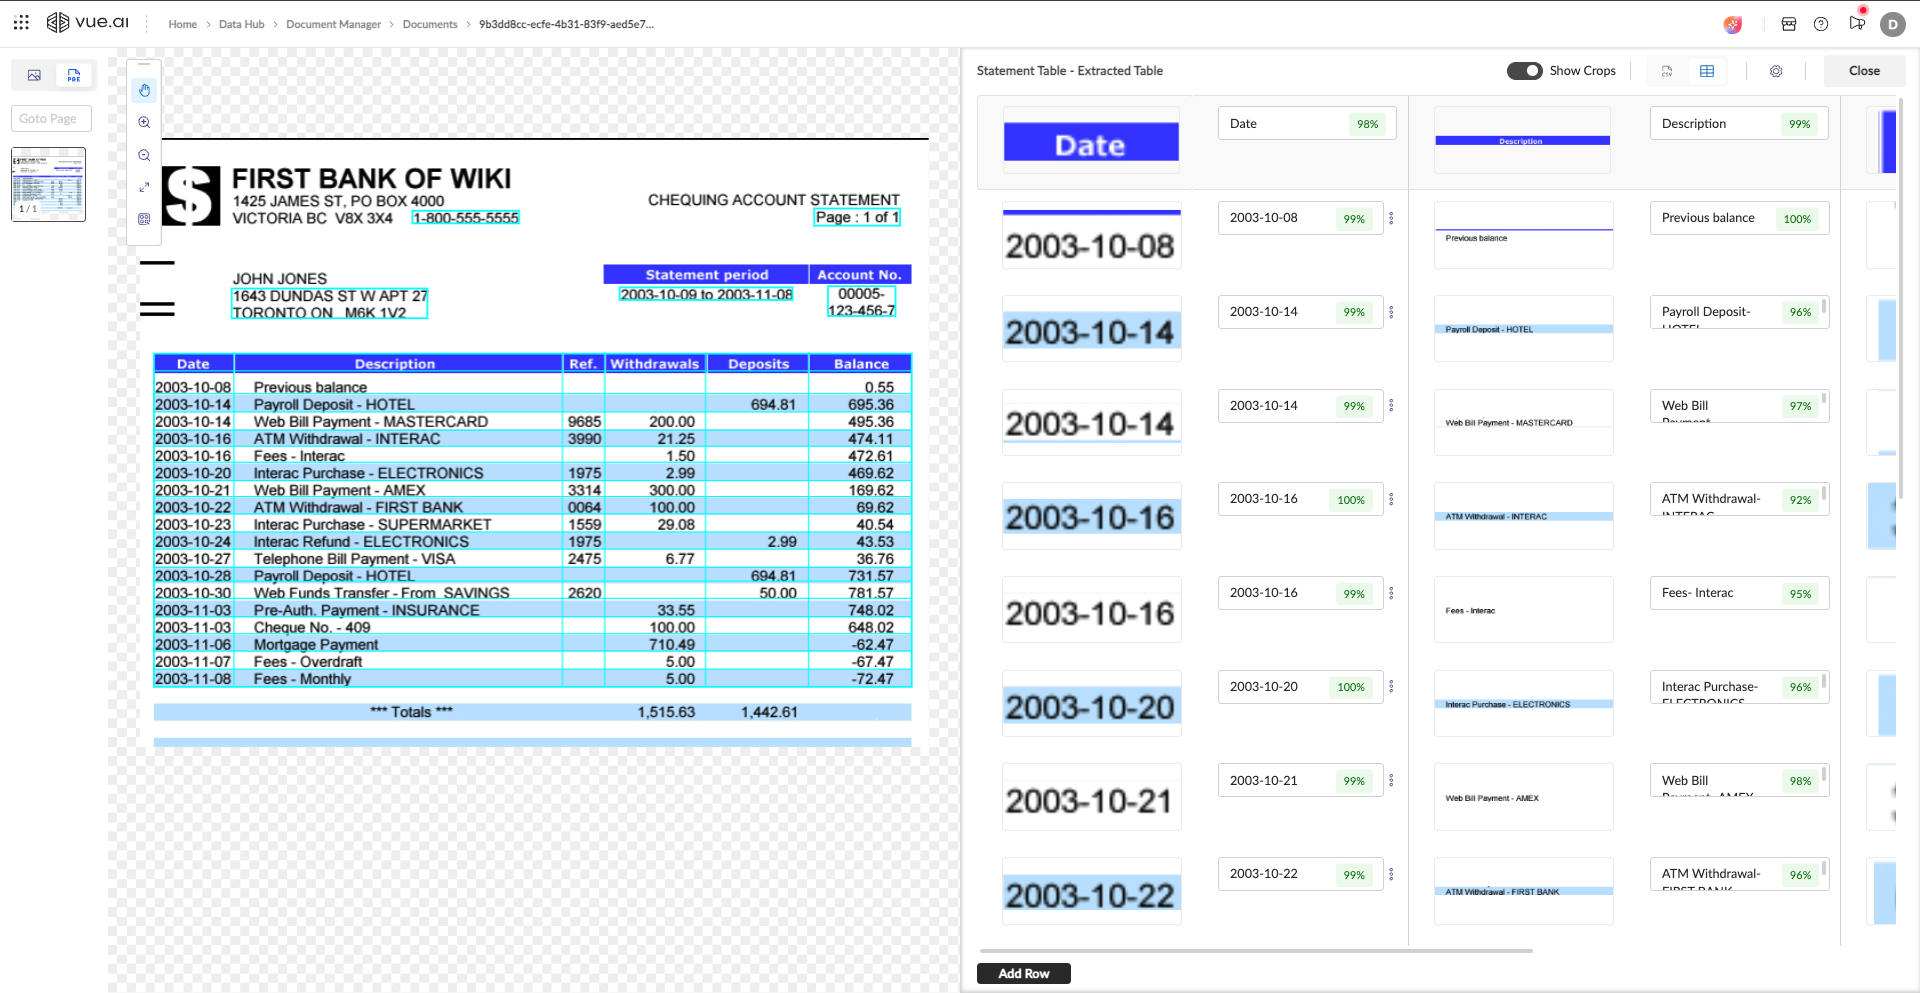 |
Step 5: Finalize the Review
Click Save and Exit. The document status updates to Reviewed. Your corrections are used to improve the model over time.